The second raid in The War Within expansion is Liberation of Undermine. The theme of this raid is goblins and their mechanical inventions. Liberation of Undermine has 8 bosses with hard-to-beat mechanics that demand coordinated teamwork and planning. In this guide, you’ll find all the crucial mechanics for each boss, helping you successfully clear the raid. Some players may still prefer speed running this raid with the help of WoW Liberation of Undermine boost and ease their workload.
Vexie & the Geargrinders
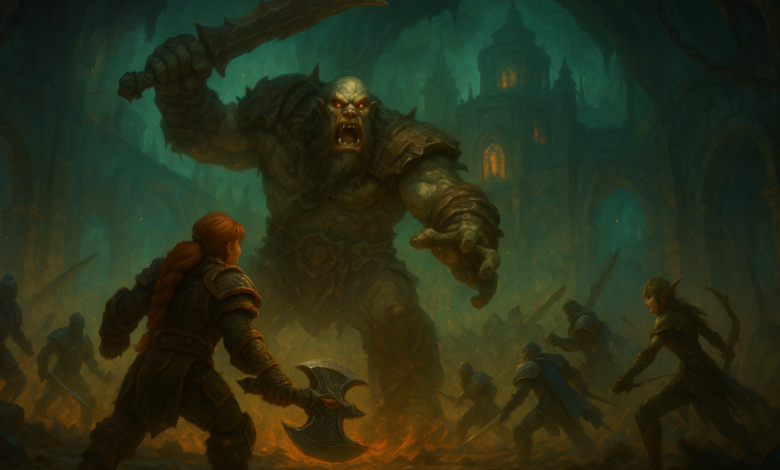
The first boss in Liberation of Undermine is a single-target encounter with adds appearing during the intermission. The fight doesn’t have many mechanics, but it can quickly overwhelm the raid group if anyone is unsure of what to do.
- The boss encounter begins with Vexie starting with 6 stacks of a buff. If the stacks stay, Vexie enrages upon reaching 100 energy, causing a wipe. To remove a stack, players need to kill the biker adds, take their bikes, and crash them into the boss.
- Vexie will also target random players, spawning oil puddles after a short delay. Make sure to drop these puddles away from the raid, as they can interrupt the bikes charging toward the boss.
- The boss will shoot fire at random players, creating persistent fire circles. Use these fire circles to burn the oil and clear space when necessary.
- Once all stacks are removed, Vexie enters the intermission phase. During this phase, she becomes vulnerable and spawns adds that attempt to heal her. Group up and kill the adds quickly.
This boss fight is actually simple, but it can be tricky if players don’t kill the bikers or use the bikes to remove stacks from the boss. Purchasing a WoW Liberation of Undermine carry can be a quick and easy way to defeat this boss and progress through the raid.
Cauldron of Carnage
The next fight in Liberation of Undermine is a dual boss. The raid group have to split into two groups and follow the mechanics to complete it successfully.
Flarendo
This boss deals fire damage and periodically spawns a bomb that must be soaked to avoid a wipe. He also casts a frontal ability on a random player, so position carefully. After the bomb, players take damage over time and leave a circle, so stay spread out. Healers should use cooldowns.
Torq
This boss constantly shoots electricity at nearby players. Moving also charges you with electricity, and once the bar is full, you will emit an AoE stun. Make sure to avoid the electricity while moving as little as possible. There is also an electric image that will fixate on players and deal heavy damage on contact.
Intermission
The bosses charge and clash in the middle of the arena. Healers need to use cooldowns at this point since the bosses deal high damage. After the intermission, everyone switches to the opposite boss and continues alternating each time.
See also: Coping with Stress: Proven Strategies for a BalancLife
Rik Reverb
The Rik Reverb encounter consists of a lot of soaks, positioning and requires consistent healing.
- This boss zone has a bunch of pylons that players need to soak. After that, players get debuffed for the next 45 seconds, making them take double damage from the next pylon.
- The pylons will spawn traveling echoes that apply DoT to players. If a player is hit a second time, they become charmed, and the other players need to kill their echo to free them.
- The tanks should aim the boss’s frontal attack away from the raid and switch between each other every few stacks.
- Once the boss enters intermission, all players should enter one of the active pylons’ zones. Then wait for the sound wave to reach you and knock you up. This will happen 2 to 3 times per intermission, and then the boss will repeat the normal phase again.
- There will also be adds that need to be killed as fast as possible. Otherwise, they will explode and apply a debuff on the whole raid.
Purchasing cheap Liberation of Undermine boost can be really beneficial since most of the bosses in this raid require a lot of teamwork.

Stix Bunkjunker
The next boss, Stix Bunkjunker, consists of a lot of adds spawning in the room and a minigame that players must complete to defeat the boss. Failing any of the mechanics below will result in a wipe.
- Ball minigame: Random players get on a ball and roll through the green stream, called junk. The junk has three sizes: small, normal, and large. Players need to consume enough to grow their ball and crash it into the large bombs. If the bombs explode, that means a team wipe. Balls can also be used to hit adds with bombs or the boss.
- Adds: There will be a lot of adds that spawn during the encounter. Adds carrying bombs need to be killed first, and the others need to be interrupted and grouped with the boss to inflict damage together.
Once the boss reaches maximum charge, it will fly in the air, become immune, and deal damage to the whole raid. Once it drops, it will have increased attack speed and damage.
Sprocketmonger Lockenstock
The first mechanic is mines that periodically spawn in the room. Players need to soak them, but each mine applies a stacking debuff to the whole raid. More than one stack can cause a wipe. Tanks should move away when hit by the tank buster since it creates an explosion around them.
Once a part of the room becomes electrified, players need to move quickly to safety. This requires a lot of group coordination, making this boss really challenging. Many people struggle with it, so Liberation of Undermine boosting services can be a good option.
While all of this is happening, rockets and beams will also appear that players need to dodge. If not dodged, it can be deadly.
The One-Armed Bandit
The boss will spawn tokens that will go towards the player. All players get stunned if they touch the tokens. If avoided, you will receive a damage buff for a short amount of time. Players can also go and push the coins back to the boss once they hit the wall.
Behind the boss, you will see combinations. Killing the adds, picking up the buff, and putting the correct combination into the boss is the key to winning. If done wrong, it will wipe the whole raid.
The tank buster will apply a puddle on the ground. Stay on the edge of the room to gain some space. If players get debuffed, they have to move away from the group and wait for the dispell.
Mug’Zee, Heads of Security
The room is split into 2 sides with different mechanics. Swapping between each side resets the boss resets its energy.
- Mug’s Side: Player will have to soak inside the rock jails and kill the adds. You will also have to aim the spears to break the walls of the jails.
- Zee’s Side: Kill the adds quickly. Split the raid into two groups for the rocket soak, as it applies a debuff that prevents soaking again for the next minute. Make sure to trigger the mines and soak the falling fire pieces, or you will wipe.
During the intermission phase, the boss will do the mechanics from both sides simultaneously.
Chrome King Gallywix
This boss consists of two different phases:
- Phase 1: Split the raid in half to correctly do the soaking mechanic. Avoid the explosions, and if targeted by the rockets, quickly get away from the raid since it applies damage over time.
- Phase 2: This second phase repeats the mechanics from Phase 1, but you need to handle the adds mobs and throw away the bombs. There will also be a soaking mechanic that needs to be done, or it can result in a wipe.